To prevent feeding tube occlusion, you’ll implement three essential flushing steps: First, perform a pre-feeding flush with 30mL sterile water to establish baseline patency and assess residual volume. Second, complete a post-feeding flush using 30-50mL sterile water immediately after feeding to clear residual formula and prevent bacterial growth. Third, maintain a structured schedule with flushes every 4-6 hours for continuous feeds or between each bolus feeding to guarantee long-term tube functionality and ideal patient outcomes.
Key Takeaways
Keep Your Feeding Tube Working: A Simple 3-Step Plan
Step 1: Flush Before Each Feeding
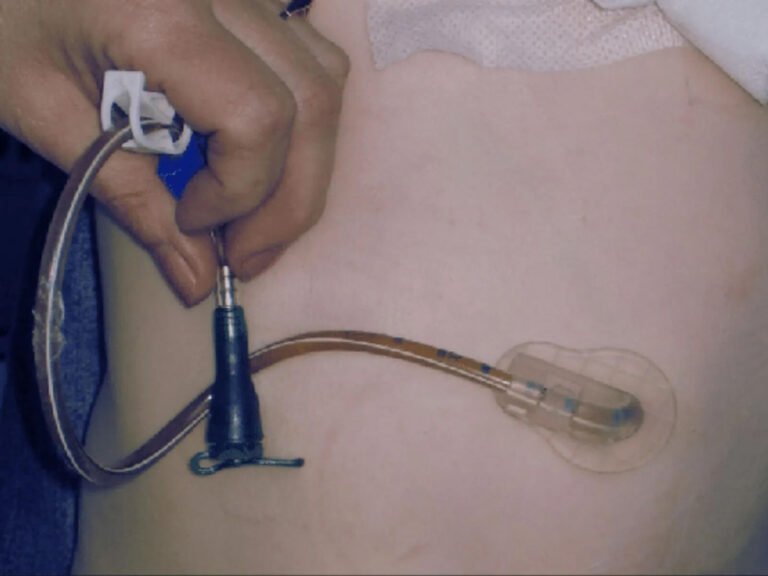
Before you start any meal through the tube, gently push 30mL of clean water through it. Think of it like running water through a garden hose before you use it. This quick check tells you the tube is open and ready to work properly.
Step 2: Flush Right After Feeding
As soon as the feeding finishes, flush the tube again with 30-50mL of clean water. Picture washing out a drinking straw after using it—you’re clearing away any leftover formula so nothing gets sticky or blocked. This simple step keeps bad germs from growing inside.
Step 3: Flush Throughout the Day
If the feeding runs all day long, flush the tube every 4-6 hours. If your loved one gets several smaller feedings, flush between each one. These regular rinses are like brushing your teeth—they prevent problems before they start.
Extra Care for Medications
When giving medicine through the tube, use 15-30mL of water between each medication. Then do one final flush at the end. This keeps medicines from sticking together or clogging the tube.
Keep Track of Everything
Write down how much water you use for each flush. Notice if the tube feels harder to push through or if anything seems different. This record helps you spot problems early and keeps track of how much liquid your loved one is getting.
You’re Doing Something Important
Taking care of a feeding tube might feel overwhelming at first, but you’re giving your loved one the nutrition they need to stay strong and healthy. Each time you gently flush that tube, you’re showing love through action. You’re preventing painful blockages and keeping them comfortable. That’s powerful care.
Remember: staying on top of these simple flushes means fewer emergencies, fewer hospital visits, and more peaceful days at home together.
You don’t have to figure this out alone. If you or a loved one need help, don’t wait. Reach out to Skilled Trach Care today at (561) 677-8909 or email us at info@skilledtrachcare.com. We’re here for you, ready to answer questions and provide the expert support your family deserves.
Pre-Feeding Flush: Establishing Baseline Tube Patency
Before initiating any enteral feeding regimen, you must establish that the feeding tube remains patent and properly positioned.
Begin by aspirating gastric contents to confirm placement and assess residual volume. If you can’t aspirate fluid, don’t assume occlusion—some tubes naturally resist aspiration due to positioning against gastric walls.
Next, flush with 30mL sterile water using gentle, steady pressure. You’ll feel resistance if blockage exists. Never force flush, as this can rupture the tube or damage gastric tissue.
Document your findings, including residual volume and ease of flushing.
This pre-feeding assessment establishes baseline tube patency and prevents complications.
When feeding protocols include systematic pre-feeding flushes, you’re protecting your patients from aspiration risks while ensuring ideal nutrition delivery through properly functioning enteral access.
Post-Feeding Flush: Clearing Residual Formula and Medications
Immediately after completing enteral feeding, you must flush the tube with 30-50mL of sterile water to prevent formula accumulation and bacterial growth within the lumen.
This critical step removes residual nutrients that can solidify and create partial obstructions, compromising your patient’s nutritional therapy.
When administering medications through the same tube, you’ll need additional flushes between each drug to guarantee formulation compatibility and prevent medication interactions.
Many medications can precipitate when mixed with enteral formulas or other drugs, causing immediate tube blockage. Use 15-30mL of sterile water between each medication, followed by a final 30mL flush.
Document all flush volumes to maintain accurate fluid balance records.
This systematic approach protects tube patency while assuring your patients receive their prescribed nutrition and medications safely.
Maintenance Flush Schedule: Preventing Long-Term Blockage Formation
Beyond immediate post-feeding flushes, you’ll implement a structured maintenance schedule to prevent gradual buildup that leads to complete tube occlusion. Your flushing frequency depends on several critical factors: feeding regimen, medication administration, and tube materials.
For continuous feeds, flush every four to six hours with 30ml sterile water. Bolus feeding patients require flushes between each feeding and at bedtime.
Silicone tubes demonstrate superior resistance to protein deposits compared to polyurethane alternatives, potentially extending flush intervals. However, you shouldn’t compromise frequency regardless of tube materials.
Document each flush meticulously, noting water volume, resistance encountered, and patient tolerance. When caring for patients with complex medication regimens, increase flushing frequency to every two to three hours.
This proactive approach prevents costly tube replacements and guarantees uninterrupted nutritional support for your patients.
Conclusion
Keeping Your Feeding Tube Working: A Simple Three-Step Plan
Taking care of a feeding tube doesn’t have to be scary or confusing. Think of it like brushing your teeth—when you do it the right way every time, you prevent problems before they start.
Step one is flushing before each feeding. This clears the path, like wiping off a table before you set down a plate. It only takes a minute, but it makes all the difference.
Step two happens right after feeding. You’ll flush away leftover formula and any medicines. Picture washing out a glass right after using it—it’s so much easier than scrubbing dried milk later.
Step three is your regular maintenance schedule. This keeps everything flowing smoothly day after day, preventing clogs that could mean emergency trips to the hospital.
When you follow these three simple steps every time, you’re doing something powerful. You’re making sure your loved one gets the nutrition they need without interruptions. You’re preventing painful complications. You’re avoiding stressful emergency situations and unexpected costs. Most importantly, you’re giving the gift of consistent, reliable care.
Picture the peace of mind that comes from knowing you’ve done everything right. Imagine your loved one comfortable and well-nourished, their tube working perfectly because you took these small but mighty steps each day.
You don’t have to do this alone. Caring for someone with a feeding tube can feel overwhelming, but you have a partner in this journey. Whether you have questions about the flushing steps, need supplies, or just want reassurance that you’re doing things correctly, help is just a phone call away.
If you or a loved one need help, don’t wait. Reach out to Skilled Trach Care today at (561) 677-8909 or email us at info@skilledtrachcare.com.