Your first week home with a tracheostomy centers on establishing a twice-daily cleaning routine, mastering suctioning techniques every 4-6 hours, and monitoring for warning signs like breathing difficulty or infection. You’ll need a dedicated care station with essential equipment including a suction machine, pulse oximeter, and sterile supplies. Most patients adapt to these tasks within 48-72 hours when following structured protocols. Understanding emergency indicators and maintaining detailed care documentation will help you shift confidently from hospital to home while ensuring your healthcare team can track your progress effectively.
Key Takeaways
- Set up a dedicated care station with suction machine, pulse oximeter, sterile supplies, and visible emergency contacts before discharge.
- Follow a structured schedule: clean twice daily, change inner cannula every 8-12 hours, and suction every 4-6 hours.
- Master gentle suctioning technique by inserting catheter without suction, withdrawing while rotating, and limiting to 10 seconds per session.
- Call 911 immediately for breathing difficulty, blue discoloration, or severe chest pain during the first week home.
- Document all care activities, secretion characteristics, and concerns in a log to share with your healthcare team.
Setting Up Your Home Care Station
Before you arrive home, designate a clean, well-lit area as your dedicated tracheostomy care station. This organized space guarantees efficient care delivery and reduces infection risk.
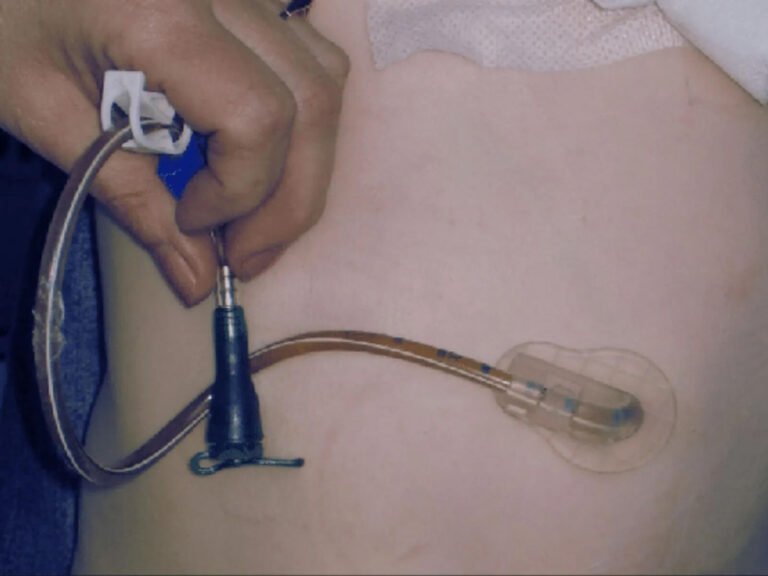
Stock your station with essential home equipment including a suction machine, pulse oximeter, and humidification system. Arrange care supplies systematically: sterile suction catheters, tracheostomy tubes (same size and one smaller), cleaning solutions, gauze pads, and trach ties.
Keep emergency contact numbers visible and maintain a backup power source for vital equipment. Store supplies in labeled containers at arm’s reach to prevent cross-contamination.
You’ll want a waste disposal system nearby and adequate surface space for sterile procedures. Consider placing a mirror to facilitate independent care as you gain confidence.
This preparation supports safe, effective tracheostomy management during your critical first week home.
Understanding Your Daily Care Schedule
During your first week home, you’ll follow a structured care schedule that typically includes tracheostomy cleaning twice daily, inner cannula changes every 8-12 hours, and stoma site assessment with each dressing change.
Your daily care checklist should document completion times, observations, and any concerns requiring medical attention.
Track every care session with detailed notes on timing, observations, and any issues that need your healthcare provider’s attention.
Expect routine adjustments as you establish timing that works within your household schedule while maintaining recommended intervals. Morning and evening care sessions often align well with medication schedules.
Document secretion characteristics, skin condition, and tracheostomy tube security at each assessment.
Your healthcare team will modify this schedule based on secretion levels and healing progression.
Maintain consistency during this critical adaptation period, as regular monitoring prevents complications and builds your confidence in independent tracheostomy management.
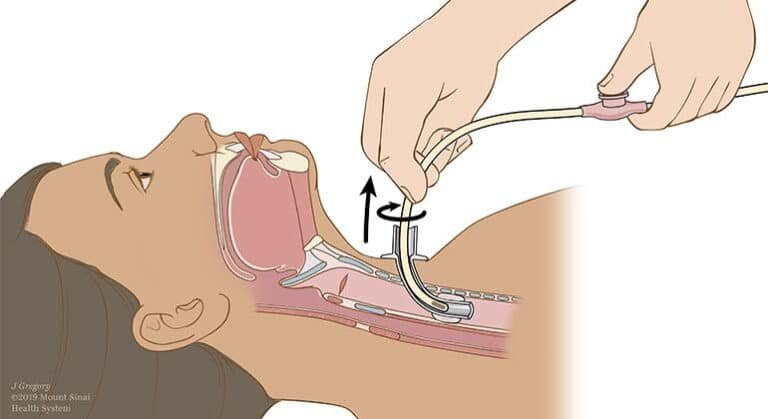
Mastering Suctioning Techniques
Suctioning removes secretions your body can no longer clear naturally through the upper airway, making it the most critical skill you’ll master during your first week home.
Your suctioning equipment includes a portable suction machine, sterile catheters, and saline for rinsing. Always use sterile technique to prevent infection.
Suctioning frequency depends on your secretion production—typically every 4-6 hours, though you’ll need more frequent suctioning if you notice increased secretions, respiratory distress, or oxygen desaturation.
Insert the catheter gently without applying suction, then withdraw while rotating. Limit each pass to 10 seconds to prevent oxygen deprivation.
Document your suctioning sessions, noting secretion color, consistency, and amount. These observations help healthcare providers adjust your care plan and identify potential complications early.
Recognizing Warning Signs and When to Seek Help
| Call 911 Immediately | Contact Provider Within 24 Hours |
|---|---|
| Difficulty breathing despite suctioning | Increased mucus production |
| Blue lips or fingernails | Low-grade fever under 100.4°F |
| Tracheostomy tube falls out completely | Mild skin irritation around stoma |
| Bleeding that won’t stop | Change in secretion color |
| Severe chest pain or pressure | Questions about routine care |
Keep emergency contacts visible on your refrigerator and programmed in your phone. Document warning signs you observe—time, symptoms, and interventions attempted. This information helps healthcare providers assess your situation accurately. Trust your instincts; you’re the expert on what feels normal for your body.
Managing Sleep and Nighttime Monitoring
Quality sleep becomes more challenging with a tracheostomy, but you’ll develop strategies that work for your situation. Establish a consistent nighttime routine that includes thorough tracheostomy care, suctioning, and securing the tube properly before bed.
Your sleep environment requires specific modifications: position the bed to allow easy access from both sides, keep emergency supplies within arm’s reach, and maintain adequate lighting for nighttime assessments.
Monitor humidity levels carefully, as dry air increases secretion thickness and mucus plugging risk. Use a bedside humidifier and consider heated humidification systems if prescribed.
Position yourself at a 30-45 degree angle to reduce aspiration risk and improve breathing comfort. Many caregivers use baby monitors or pulse oximeters for continuous observation.
You’ll gradually recognize normal nighttime sounds versus concerning changes requiring immediate intervention.
Coordinating With Your Healthcare Team
While establishing your home care routines, you’ll need clear communication pathways with multiple healthcare providers who now form your support network.
Maintain an updated contact list including your pulmonologist, ENT specialist, home health nurse, respiratory therapist, and emergency services. Document all tracheostomy care observations in a dedicated log—note secretion characteristics, cuff pressures, and any concerns that arise.
Effective communication strategies include scheduling regular follow-up appointments before leaving the hospital and clarifying which provider handles specific issues.
Team collaboration improves when you share your care log during visits, enabling providers to track patterns and adjust treatment plans accordingly.
Don’t hesitate to contact your healthcare team between appointments if you observe unusual changes. Quick intervention prevents complications and reinforces the partnership essential for successful home tracheostomy management.
Balancing Medical Care With Family Life
Integrating tracheostomy care into family routines requires intentional planning that addresses both medical needs and emotional well-being.
You’ll need to establish clear caregiving roles that prevent burnout while maintaining care quality. Designate specific times for tracheostomy maintenance that don’t completely overshadow normal family activities like meals and bedtime routines.
Family dynamics will shift as everyone adapts to new responsibilities. Involve children appropriately—they can learn basic safety awareness without bearing caregiving burden.
Schedule regular family meetings to discuss concerns and celebrate progress.
Emotional support proves essential for both the patient and caregivers. You’ll benefit from connecting with support groups where others understand your challenges.
Don’t hesitate to accept help from extended family, friends, or respite care services. Remember, maintaining your own well-being directly impacts your ability to provide quality care.
Conclusion
You’ve covered essential tracheostomy care fundamentals for your first week home. Remember, competence develops with consistent practice—don’t expect perfection immediately. Keep your emergency contacts readily accessible, maintain your supply inventory, and document any concerns for your healthcare team. You’re building critical skills that’ll become routine. Trust your training, stay vigilant for warning signs, and don’t hesitate to reach out for support. You’re capable of managing this successfully while maintaining your family’s quality of life.